· atlassian · 5 min read
Mastering Jira Automation: Tips and Tricks for Creating Effective Automation Rules

Jira Automation is a powerful feature that can save your team time and streamline workflows by automating repetitive tasks. Whether you’re new to Jira or looking to refine your automation skills, these essential tips and tricks will help you create effective automation rules that enhance productivity and efficiency.
1. Define Clear Objectives
Before diving into automation, it’s crucial to define what you want to achieve. Identify tasks that are repetitive, time-consuming, or prone to human error. Understanding your objectives will help you create focused and effective automation rules.
Tip: Start with a specific problem or process you want to automate, such as sending notifications for overdue tasks or updating issue statuses based on specific triggers.
2. Utilize Jira’s Pre-Built Templates
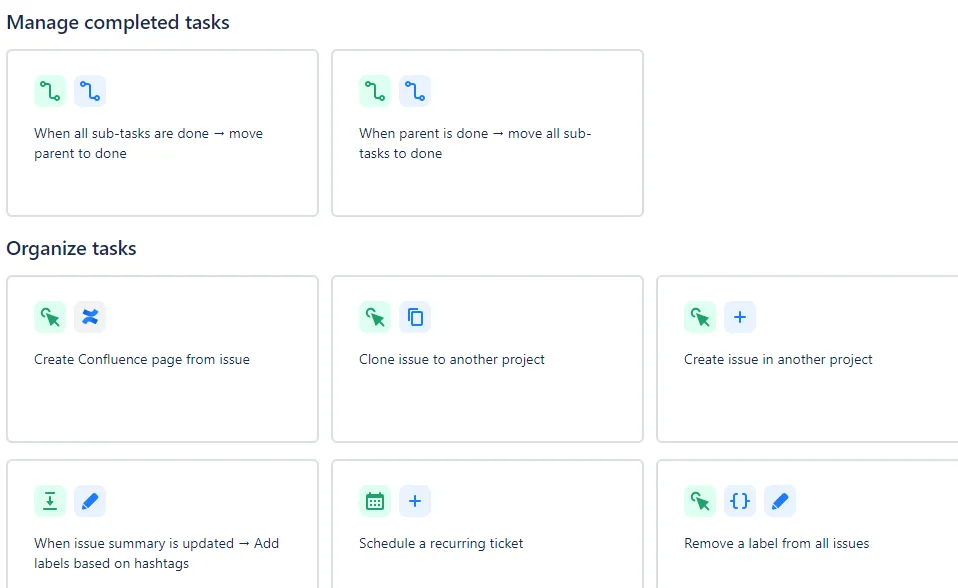
Jira offers a range of pre-built automation templates that cover common use cases, from transitioning issues to sending alerts. Leveraging these templates can speed up the setup process and ensure that you’re using best practices.
Tip: Explore Jira’s template library and customize a template to fit your specific needs. It’s a great starting point for creating more complex rules.

3. Use Triggers Wisely
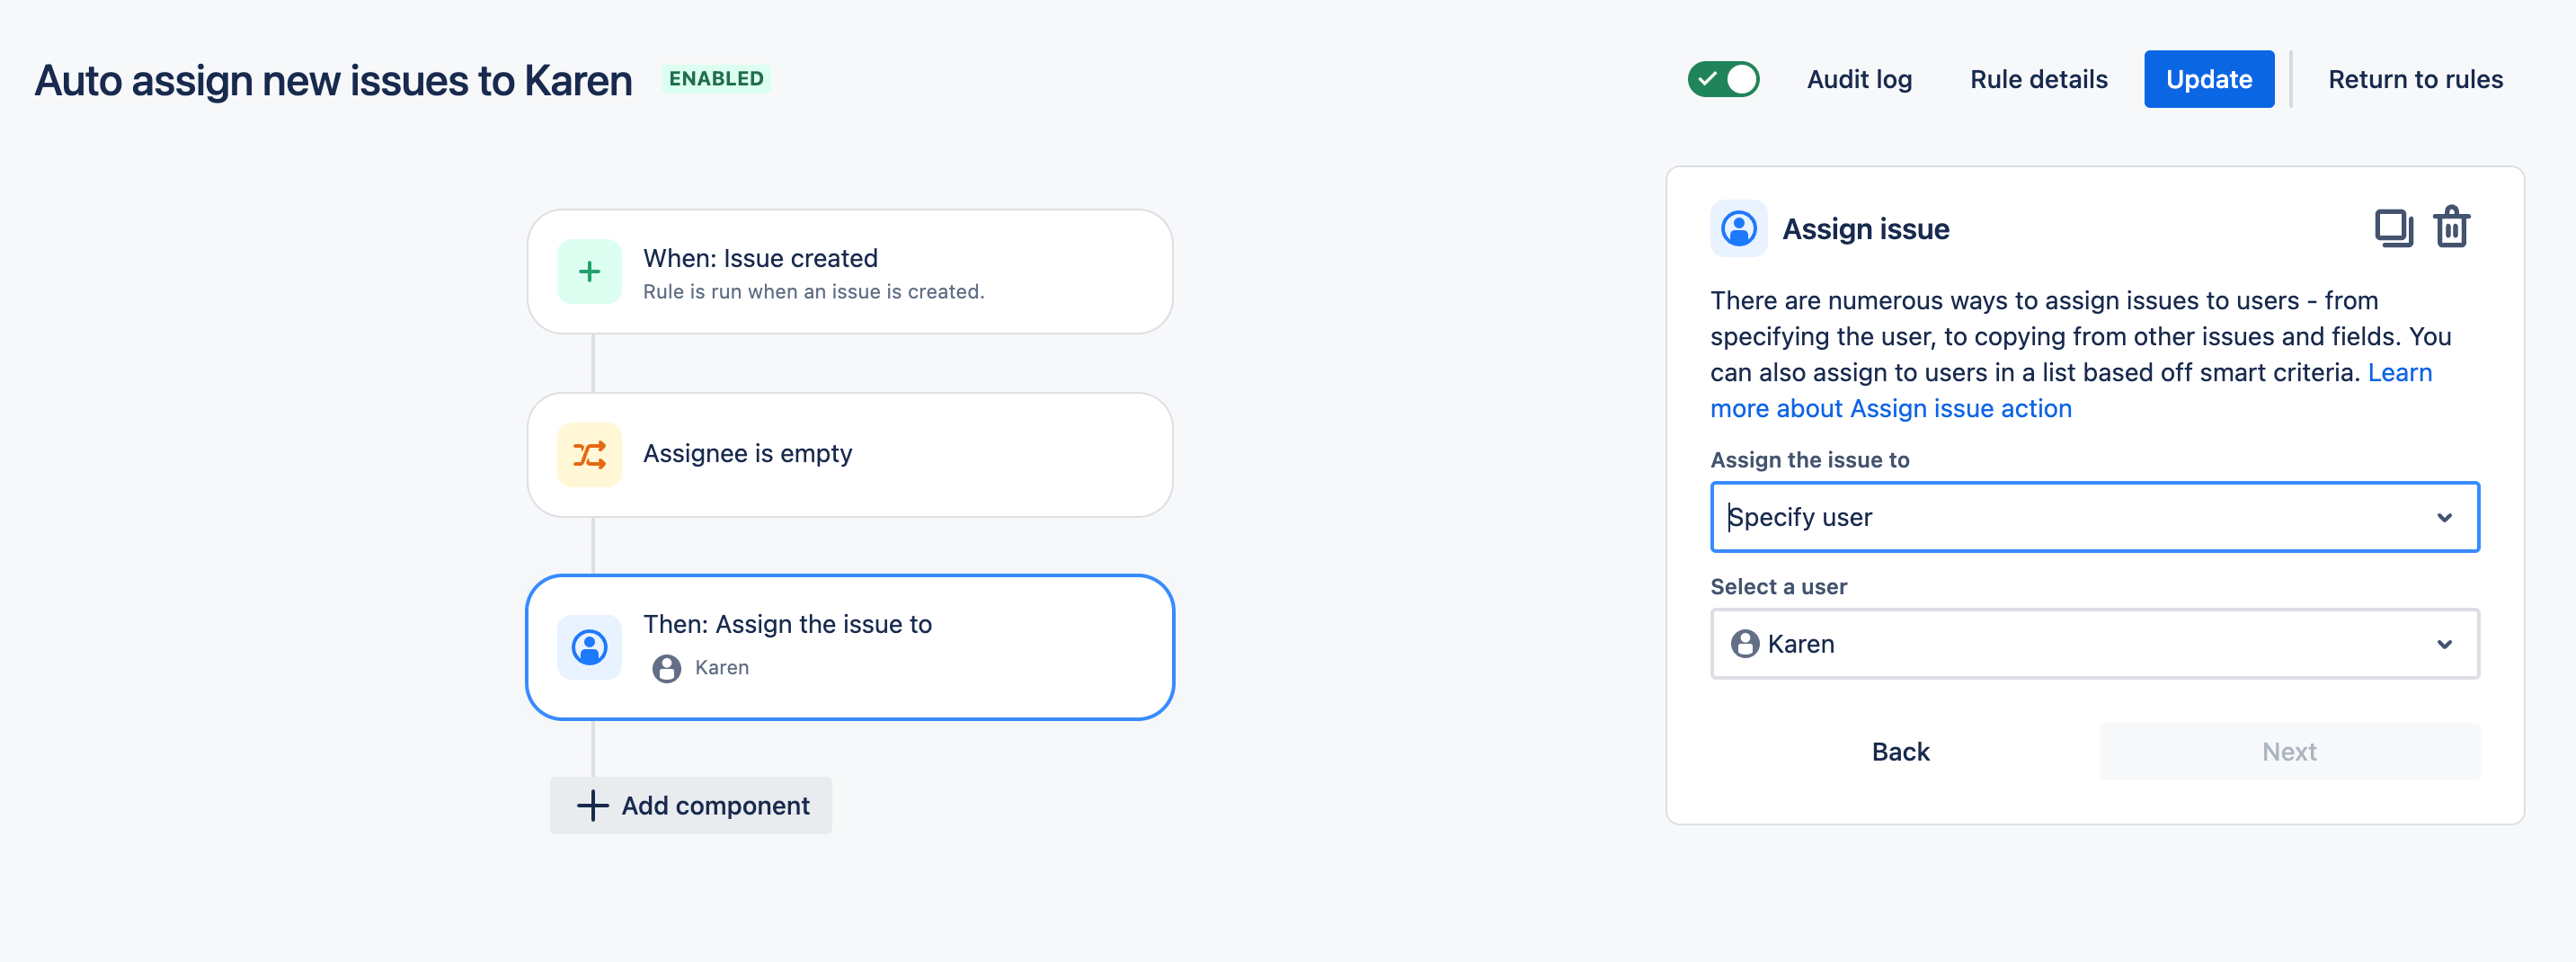
Triggers are the events that kick off your automation rule. Jira provides various triggers, including issue creation, status changes, and comments. Choose triggers that align with your automation goals and ensure that they capture the events that matter most to your workflow.
Tip: Test different triggers to find the most effective ones for your processes. For example, use the “Issue Updated” trigger to automate actions when specific fields are changed.

4. Incorporate Conditions
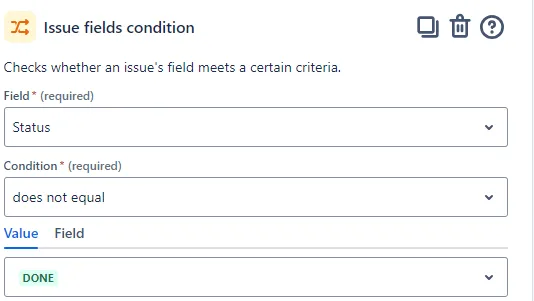
Conditions help refine when and how automation rules are applied. By setting conditions, you can ensure that automation rules only execute under specific circumstances, reducing the risk of unwanted actions.
Tip: Use conditions to filter issues based on criteria like issue type, priority, or custom fields. For instance, only trigger an automation rule if an issue is marked as “Critical” or assigned to a specific team member.

5. Leverage Actions for Automation
Actions are the tasks that Jira performs when a rule is triggered. Actions can include changing issue statuses, sending notifications, or updating fields. Choose actions that align with your objectives and enhance the effectiveness of your automation rules.
Tip: Combine multiple actions in a single rule to create complex workflows. For example, automatically transition an issue, update its priority, and notify the assignee when a high-priority issue is created.
6. Test Your Automation Rules
Before deploying automation rules across your projects, thoroughly test them to ensure they work as expected. Testing helps identify any issues or unintended consequences and allows you to make adjustments before going live.
Tip: Create a test project or use sample issues to validate your automation rules. Monitor the results and adjust the rules based on the feedback.
7. Monitor and Adjust Automation Rules
Once your automation rules are live, regularly monitor their performance to ensure they’re achieving the desired outcomes. Jira provides insights into automation rule executions, which can help you identify any issues or areas for improvement.
Tip: Review automation logs and reports to assess rule effectiveness. Adjust rules as needed based on performance data and feedback from team members.

8. Use Smart Values for Dynamic Data
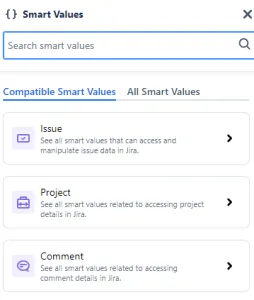
Smart values are placeholders that dynamically pull in data from Jira issues or other sources. Utilizing smart values in your automation rules allows for more personalized and contextually relevant actions.
Tip: Incorporate smart values in notifications or comments to include details like issue summary, assignee, or custom field values. For example, use {{issue.summary}} in a notification to provide specific information about the issue.

9. Automate Routine Maintenance Tasks
Automation isn’t just for handling issues; it can also be used for routine maintenance tasks, such as cleaning up stale issues or updating field values based on specific conditions.
Tip: Set up automation rules to automatically close resolved issues after a certain period or update field values based on issue age or other criteria.
10. Collaborate with Your Team
Engage with your team to understand their pain points and gather feedback on automation needs. Collaboration ensures that automation rules align with team workflows and address real challenges.
Tip: Regularly review and discuss automation rules with your team to identify opportunities for improvement and ensure that automation supports their daily tasks effectively.
Conclusion
Jira Automation can transform the way your team works by eliminating repetitive tasks and ensuring consistency across projects. By defining clear objectives, leveraging pre-built templates, using triggers and conditions wisely, and testing your rules, you can create automation that enhances efficiency and productivity. Regularly monitor and adjust your automation rules, and collaborate with your team to ensure that your automation strategy meets their needs and evolves with your processes.
Explore Jira Automation today and discover how these tips and tricks can help you streamline your workflows and achieve greater efficiency in your projects.
Start exploring Jira Automation today and take the first step toward streamlining your workflows. For a free consultation on how to implement Jira Automation in your organization, email us at sales@easesolutions.com. Let us help you achieve greater efficiency in your projects!
For a free consultation on how to implement Jira Automation in your organization, email us at sales@easesolutions.com.
Let us help you achieve greater efficiency in your projects!


